In this article:
- Overview
- Audience
- Prerequisites
- Discovering the unregistered instances
- Registering an instance
- Contacting Cloud Application Manager Support
Overview
Cloud Application Manager can auto-discover existing instances that have been provisioned directly using the provider console outside of Cloud Application Manager. With this capability, even if some of your teams are using the provider's console to provision instances, you can import them into Cloud Application Manager and manage their lifecycle as well as view them as part of the Cloud Reports.
It is important to realize that discovered instances will exist only as an instance. In addition, Cloud Application Manager does not create a corresponding Deployment Policy as part of registration process.
You can check the full process by watching the following video:
Audience
Users who want to register their instances into Cloud Application Manager to enable lifecycle management on them.
Prerequisites
- An active Cloud Application Manager account
- An existing account of some provider with active instances
- Having configured the provider with that account
Discovering the unregistered instances
- When adding a provider for the first time
- When having an existing provider in Cloud Application Manager
- When enabling automatic discovery of resources
Let's see them in detail below:
When adding a provider for the first time
As soon as you add a provider in your workspace, Cloud Application Manager will auto-discover all existing instances in that provider and save them in the Unregistered Instances tab under the provider details. These unregistered instances will also be shown in the Instances page under All or Unregistered submenu items. Then, you can follow the on-screen instructions to register them in Cloud Application Manager.
When having an existing provider in Cloud Application Manager
If you have an existing provider in Cloud Application Manager, the next time you click on Sync all the instances that exist in that provider, but have not been provisioned yet using Cloud Application Manager, will be auto-discovered and saved in the Unregistered Instances tab under the provider details. Then, you can follow the on-screen instructions to register them in Cloud Application Manager.
When enabling Automatic Discovery of Resources
You can enable the Automatic Discovery of Resources toggle in the provider Services tab.

When enabled, it will cause an automatic synchronization just for unregistered instances every 20 minutes to check for any change in the available instances and their corresponding state. The Unregistered Instances tab in the provider details as well as the Instances page where unregistered instances are shown will display the state from latest synchronization, triggered either automatically or explicitly by pressing the Sync button.
This feature is only available for Optimized or Managed providers.
Registering an instance
Instances can be registered either from the Unregistered Instances tab of your provider details page, where you can import a single instance or select many of them and execute a bulk register, or from the Instances page where you can register one instance at a time.
It is not necessary to be in the target workspace scope where you want to register the instance, since instance registration from a scope other than a workspace will ask for the target workspace to register the instance in.
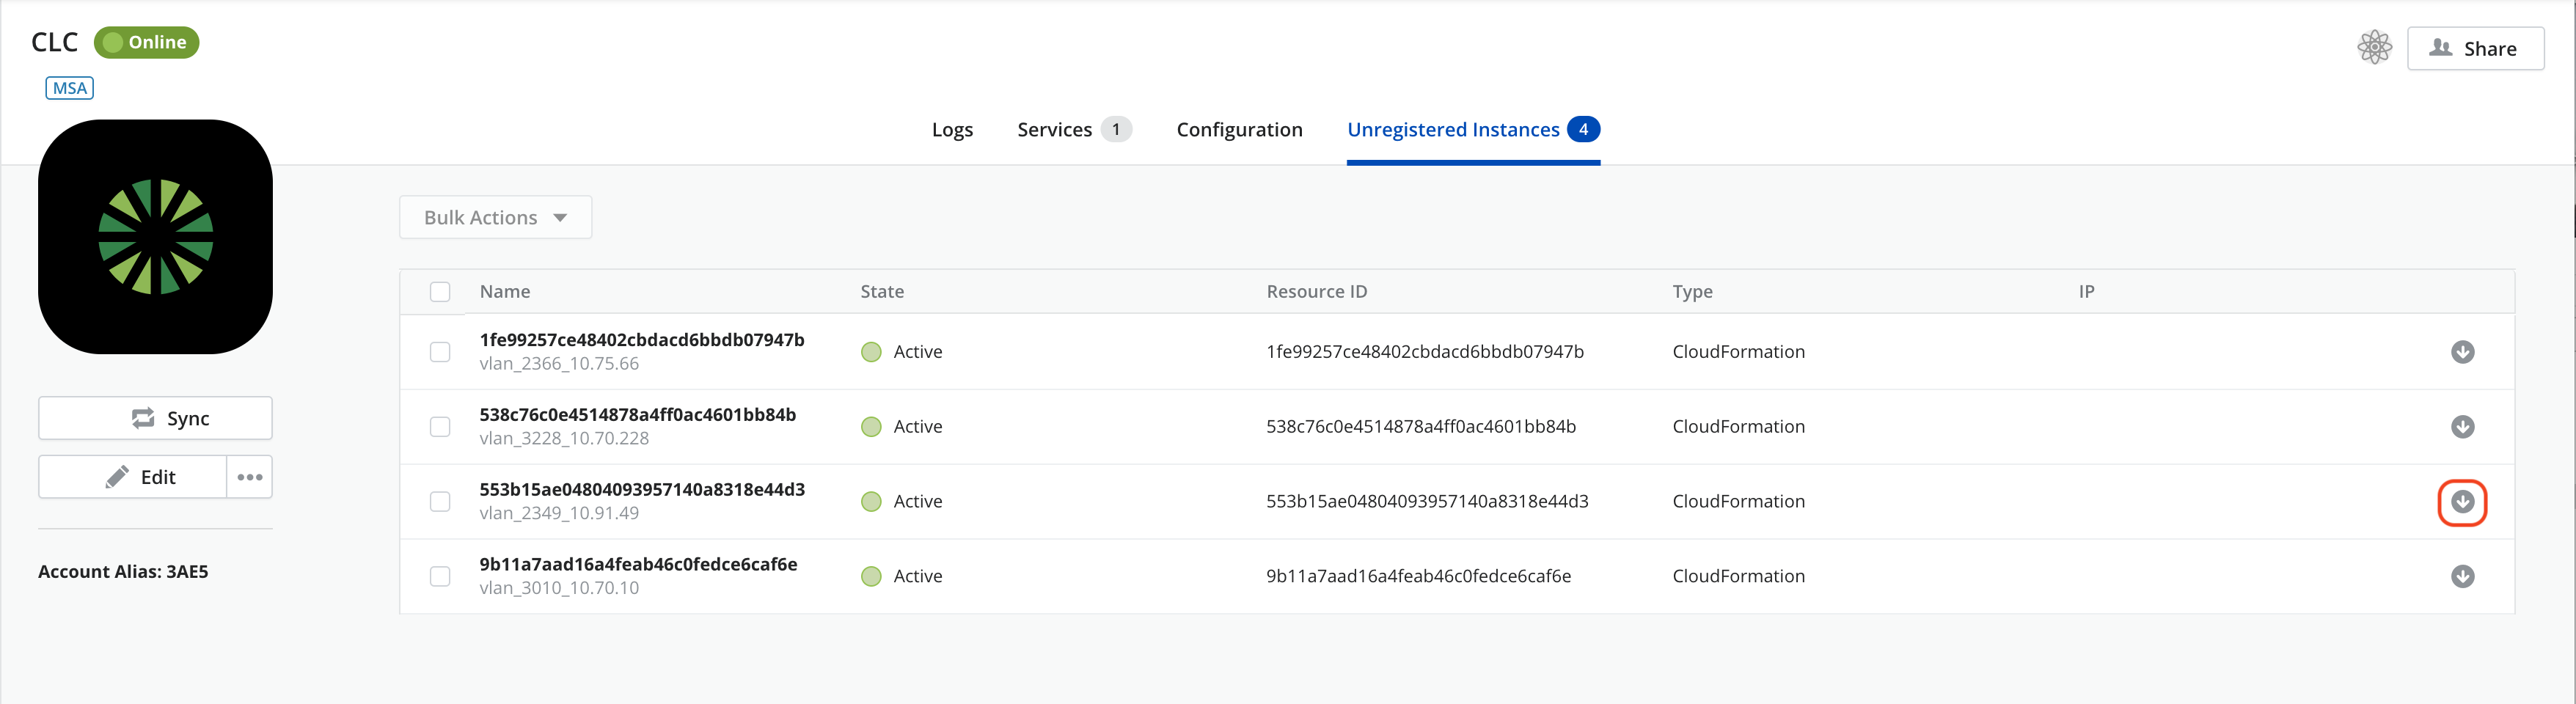
Register an instance or instances from the Unregistered Instances tab
Click on the register icon of an instance:
Or choose several unregistered instances of your provider and click Bulk Actions > Register.
Then, follow the steps of the Registration process below.
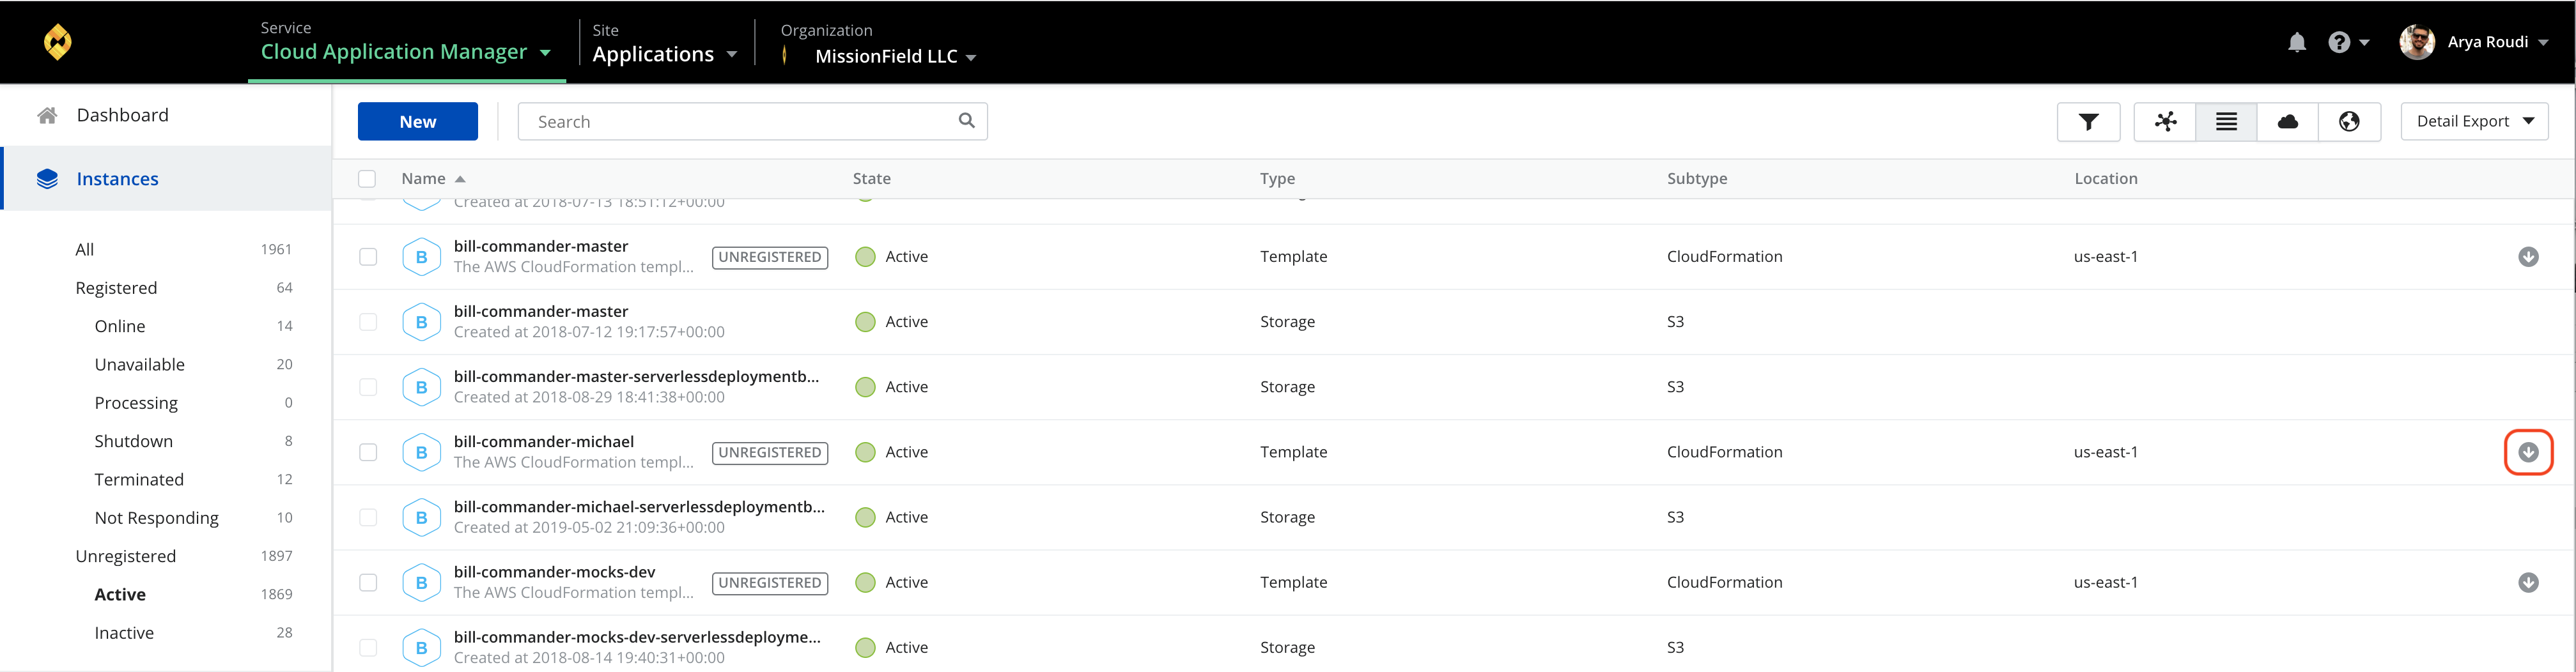
Register an instance from the Instances page
You must be in the All or Unregistered view of the Instances page and click on the register icon of the instance you want to register.
Then, follow the steps of the Registration process below.
Registration process
-
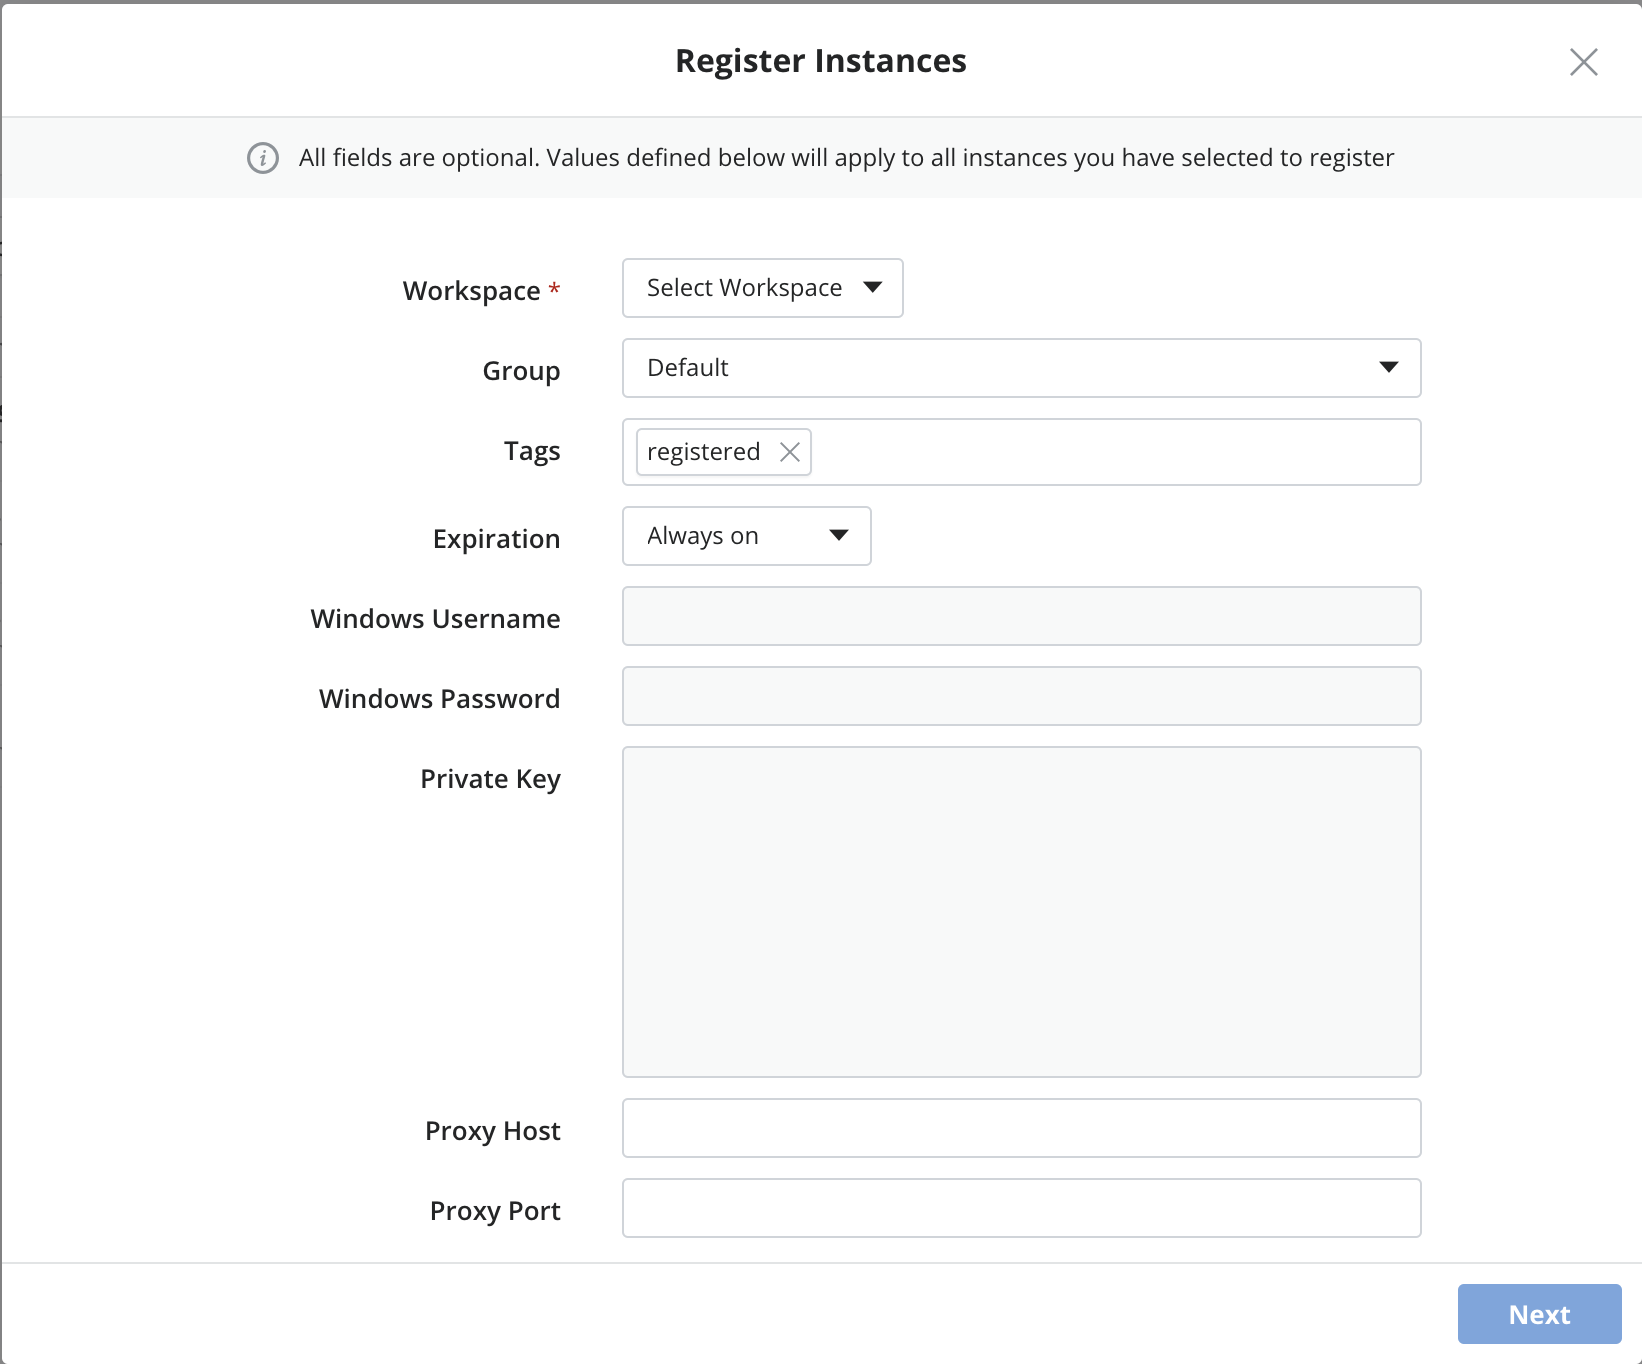
Start registering. When performing a bulk register, a previous step appears in the dialog providing the option to apply property values to all instances to register. The following image shows the dialog displayed when bulk registering in a Lumen Cloud provider type:
-
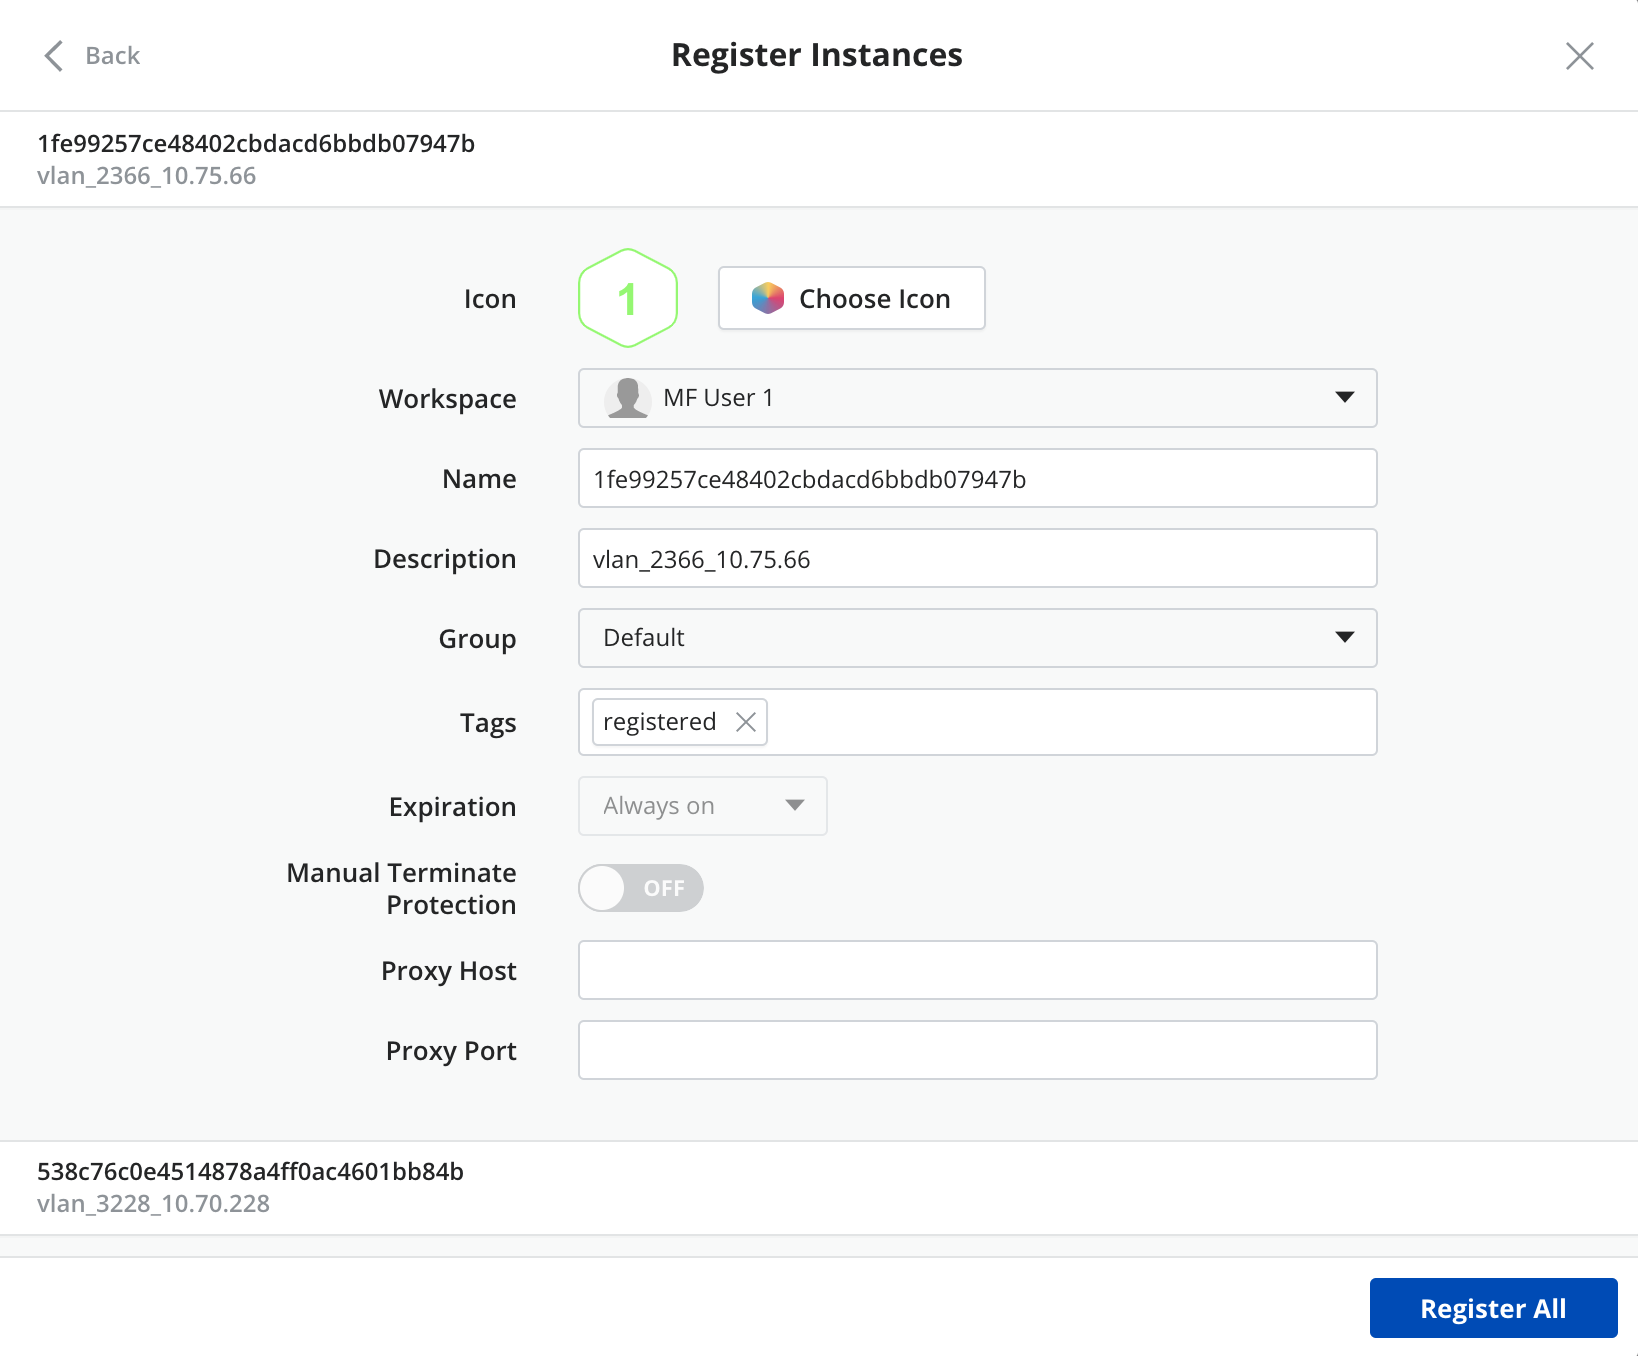
The next step of the bulk import will allow you to set the properties for each instance to be registered:
-
If you are registering a single instance, a single step dialog appears asking for information to complete the register process:
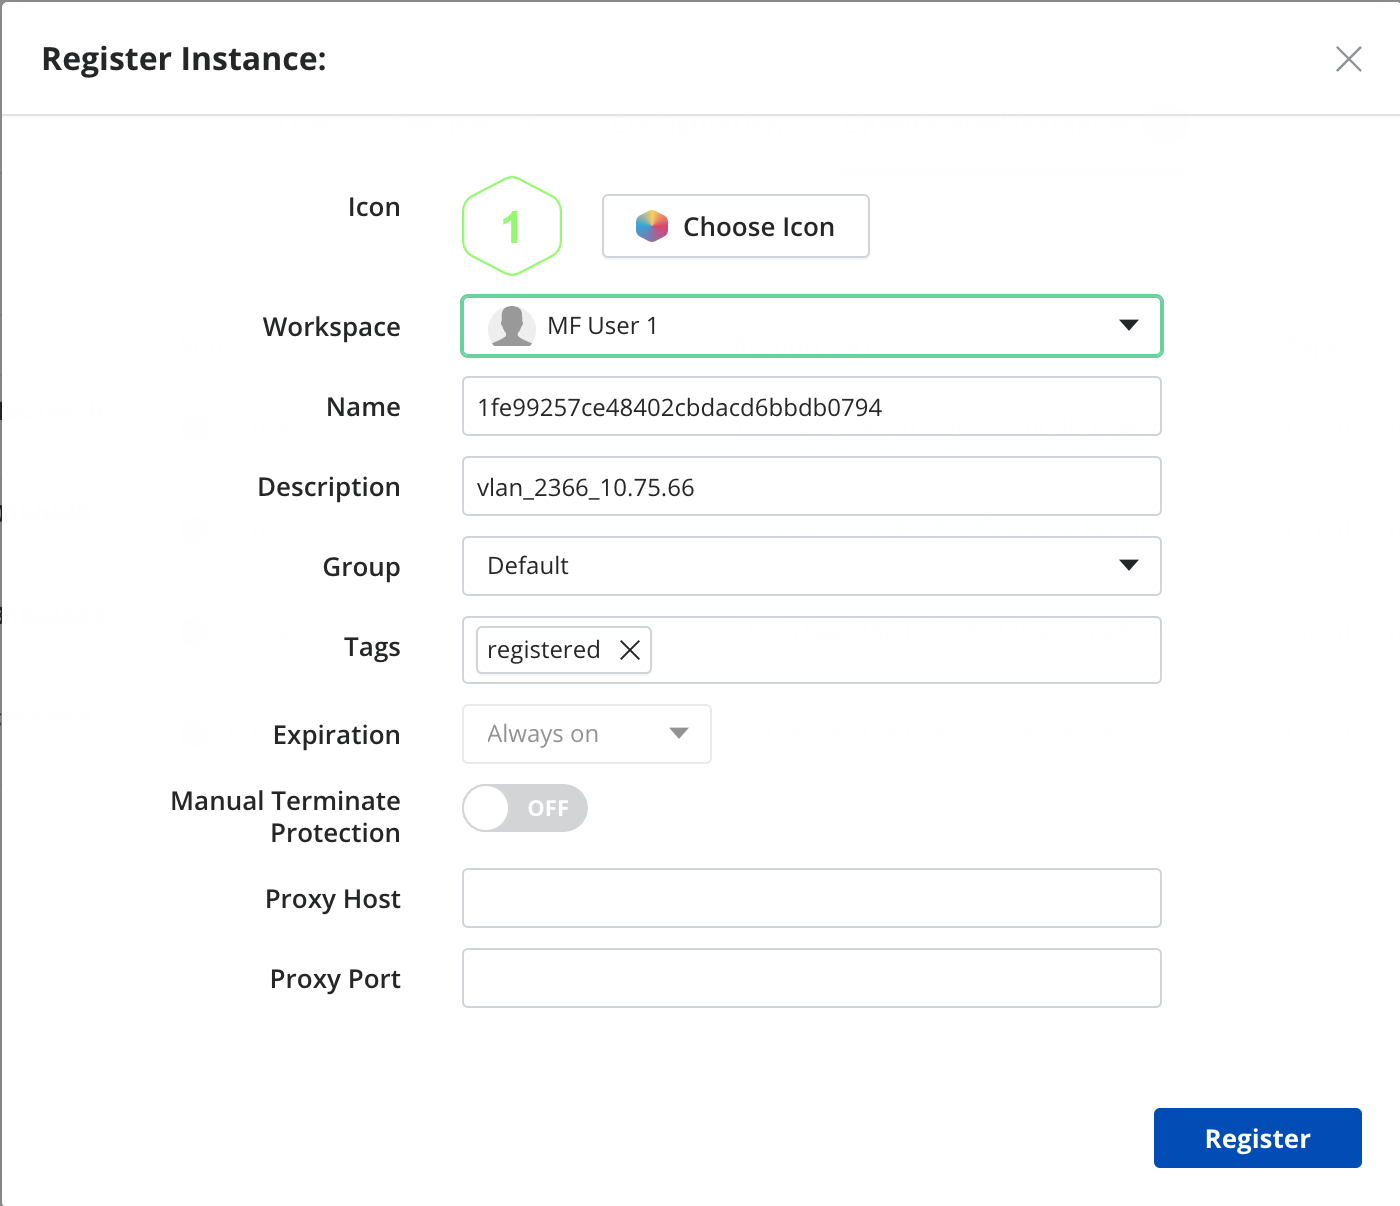
-
It is important to note that if you are not placed into a workspace scope, a target workspace must be provided:
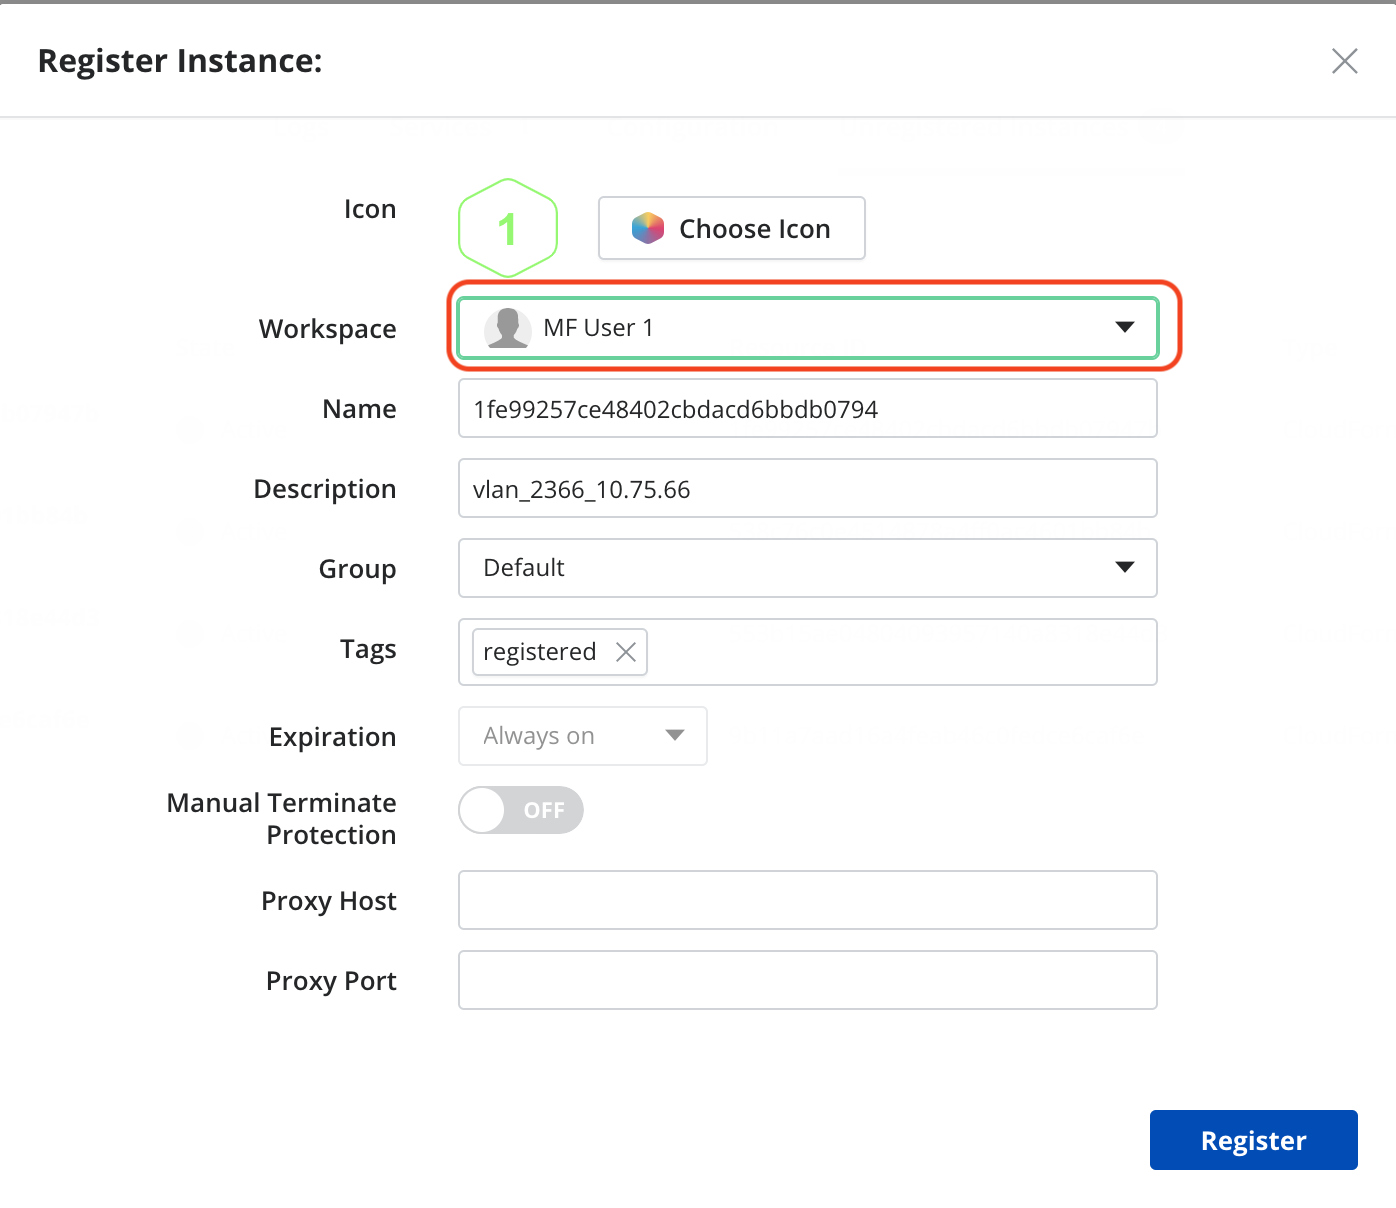
-
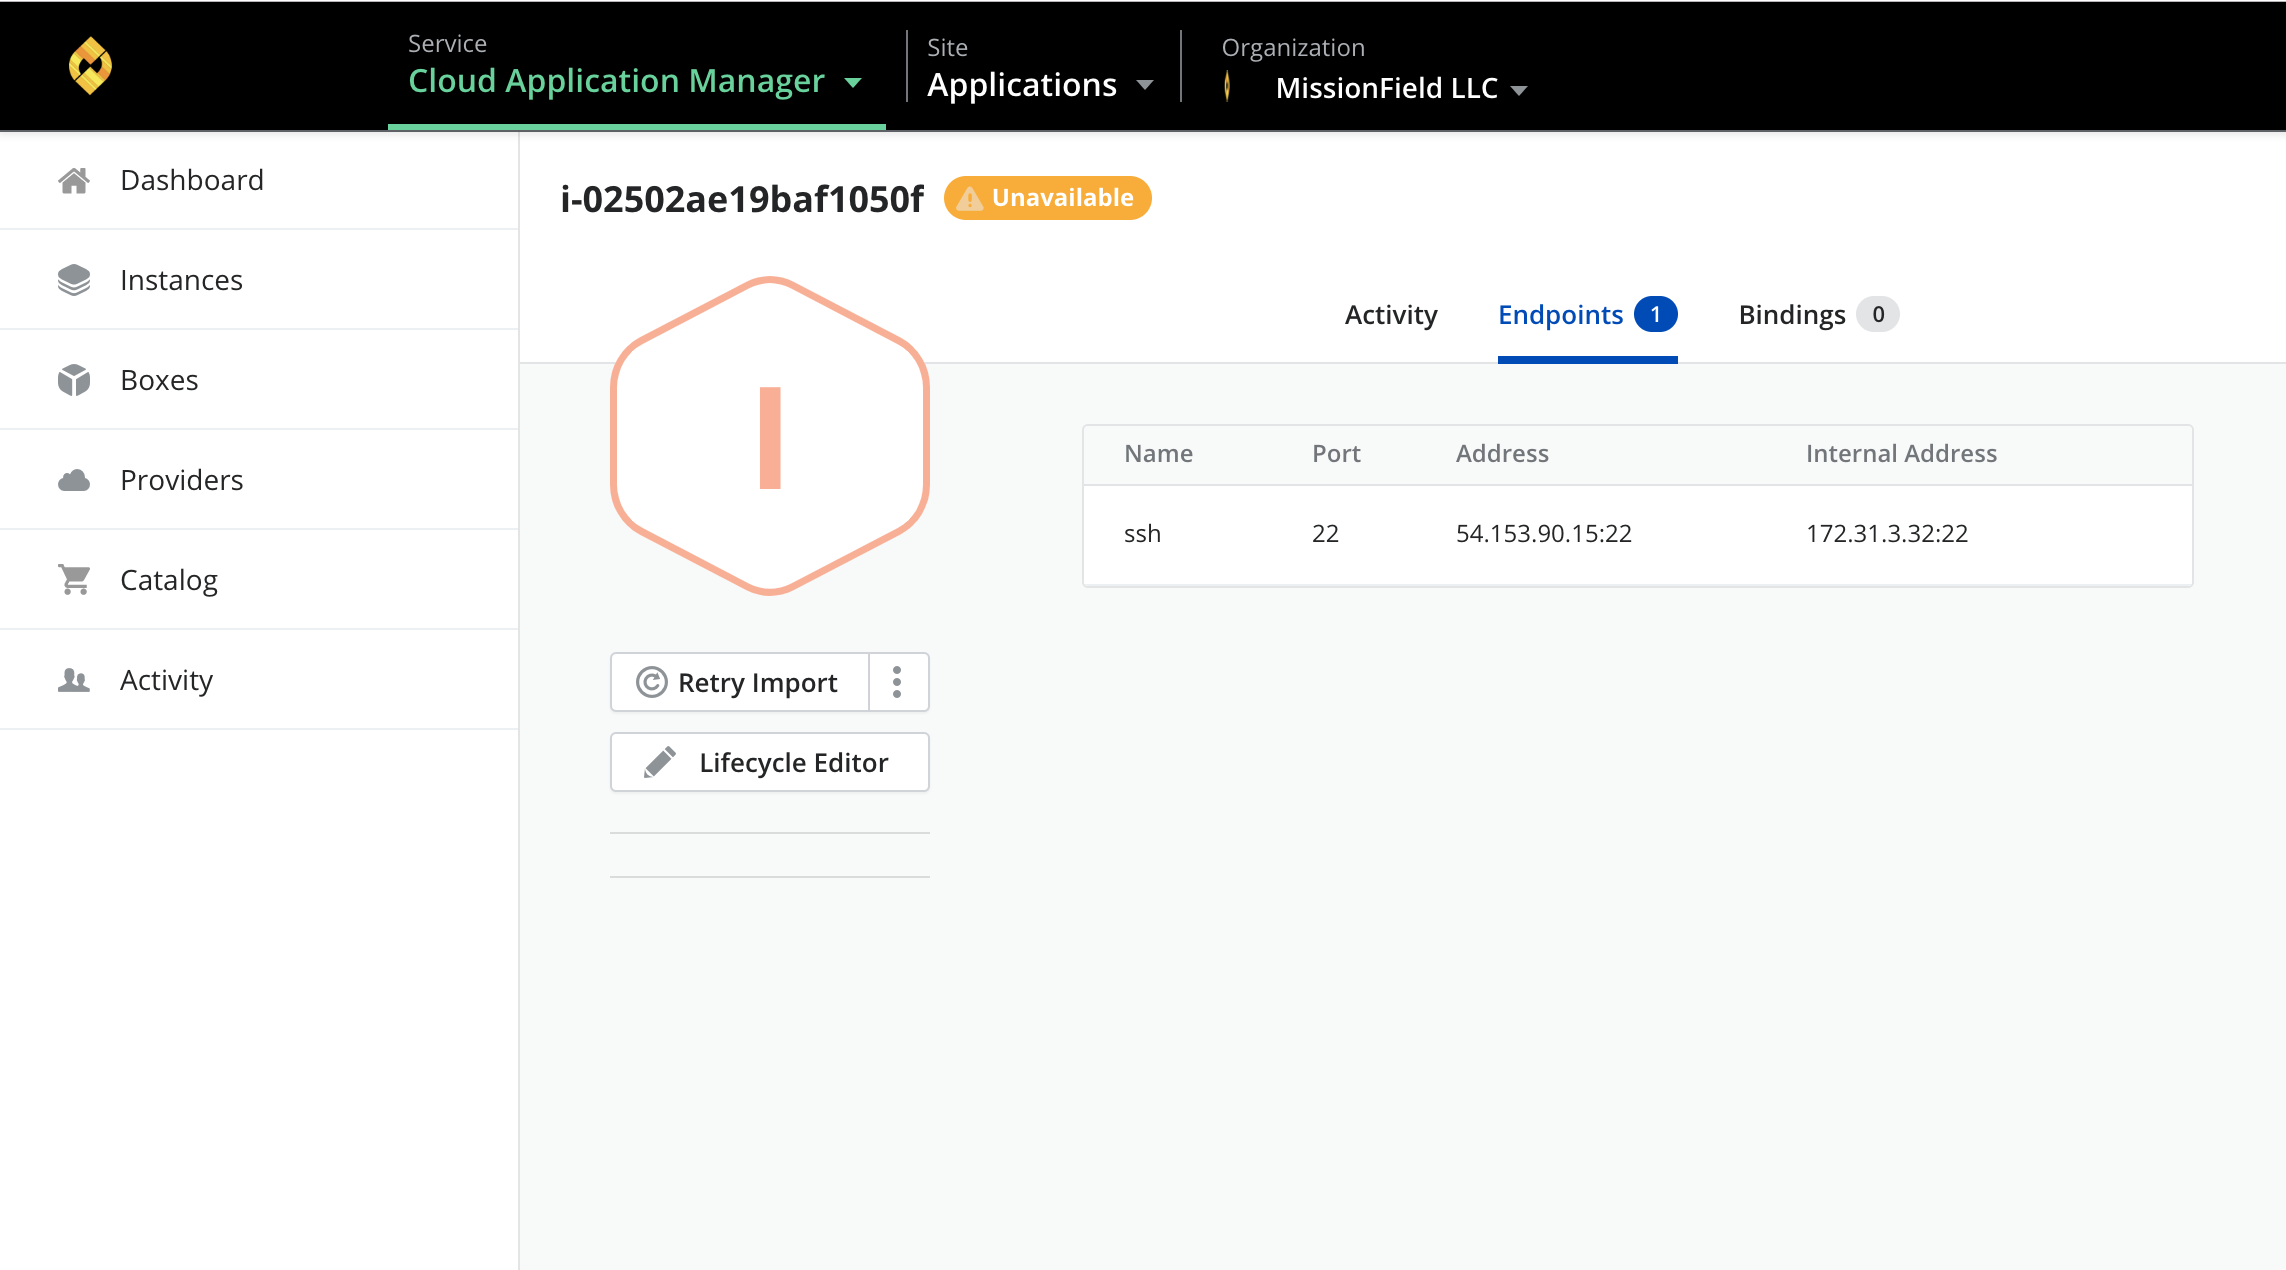
When you click on Register button, the instance details page show the result of the register process:
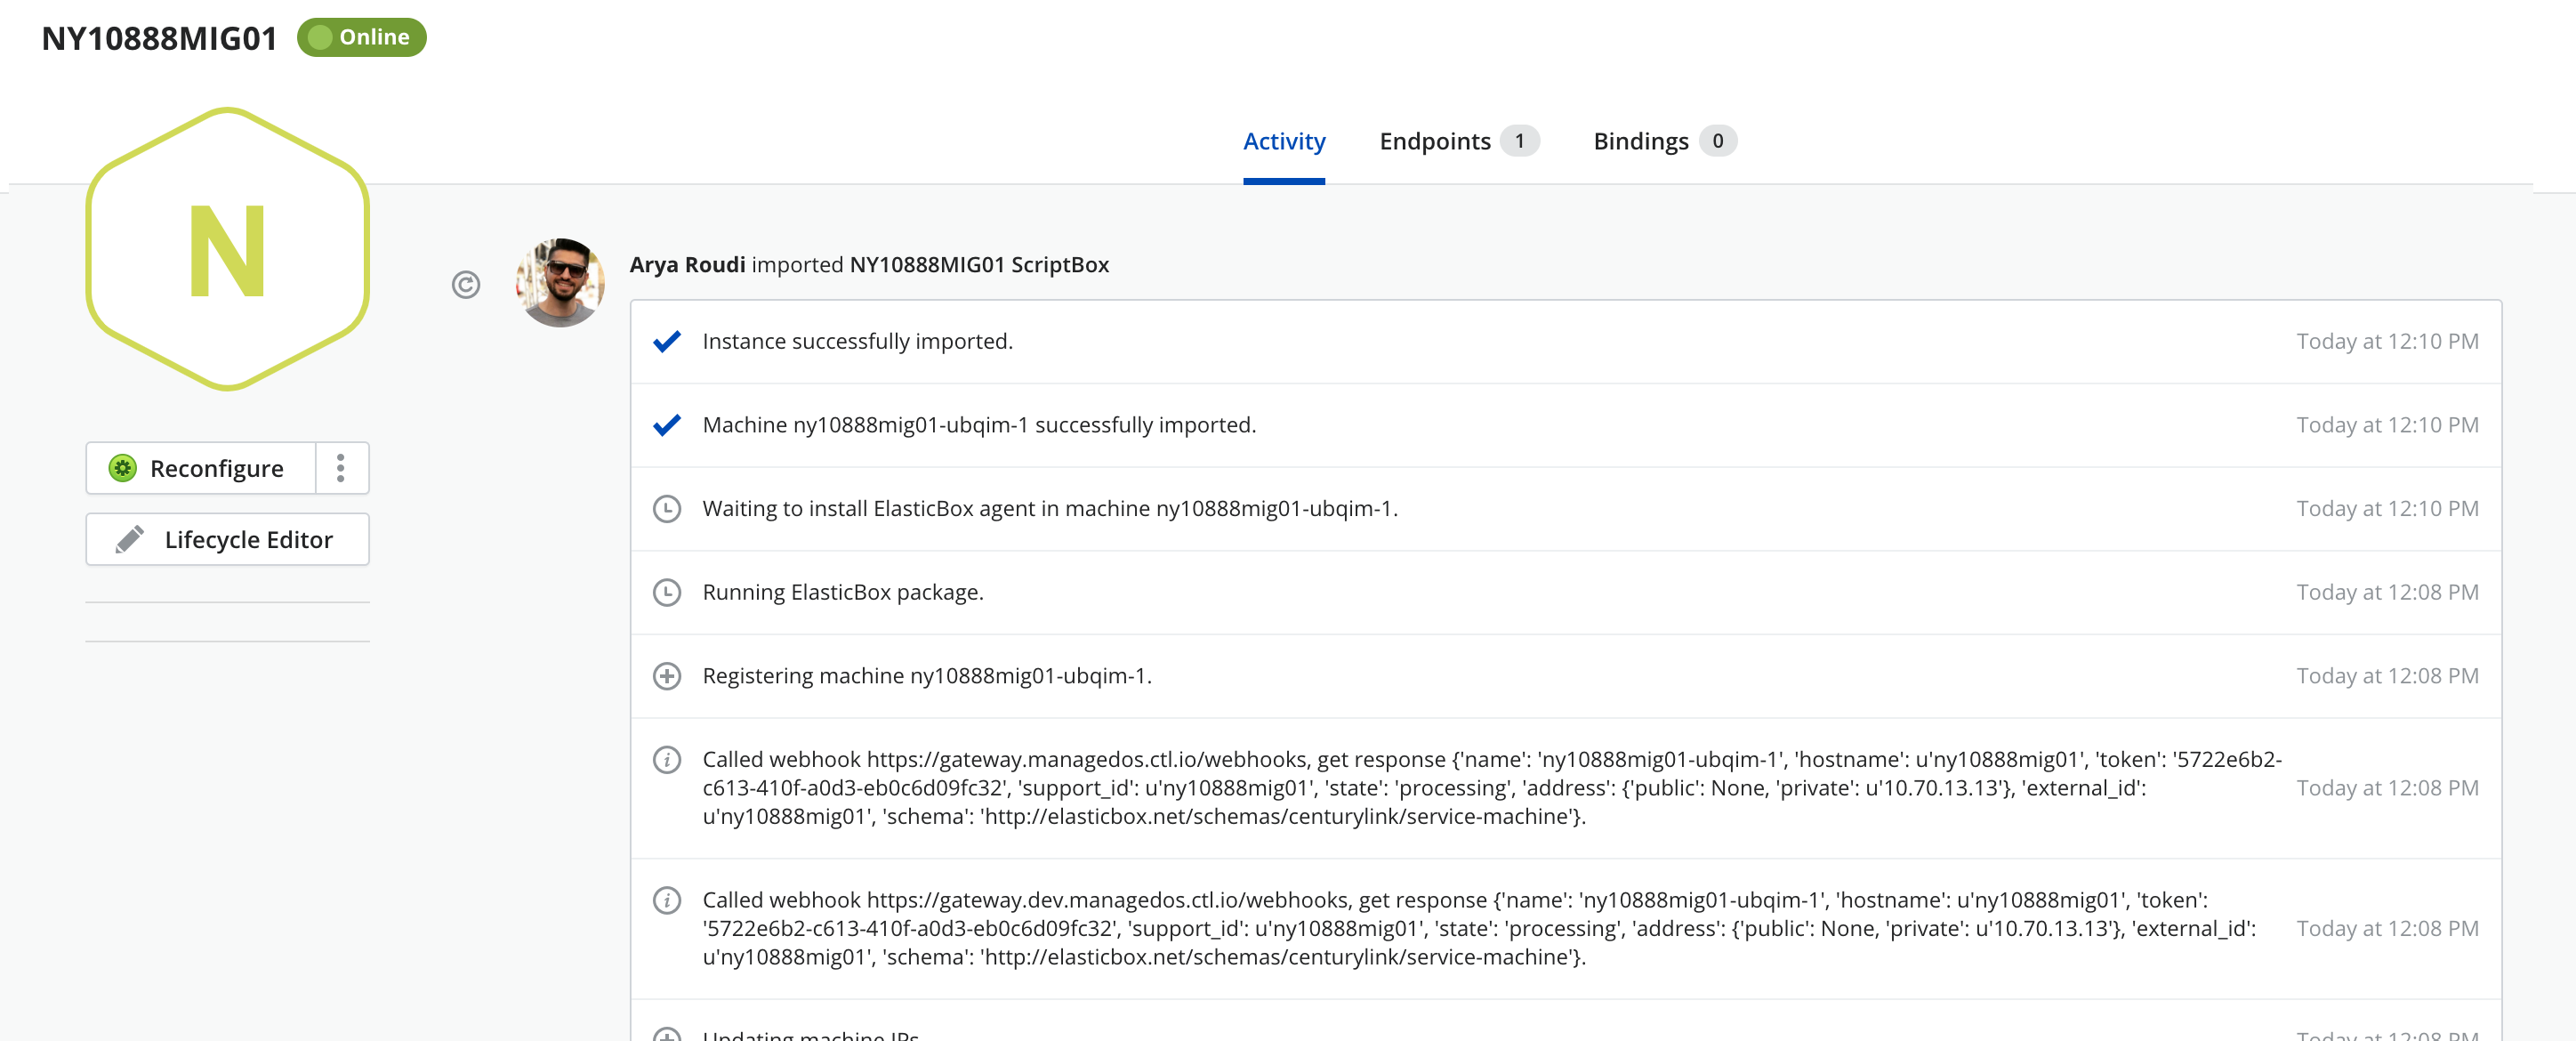
-
If an Unsuccessful Registration occurred, either if the credentials are not valid or the instance IP address is not accessible through the internet:

-
Go to the instance details where you should find the command to be executed into the instance to manually register it:
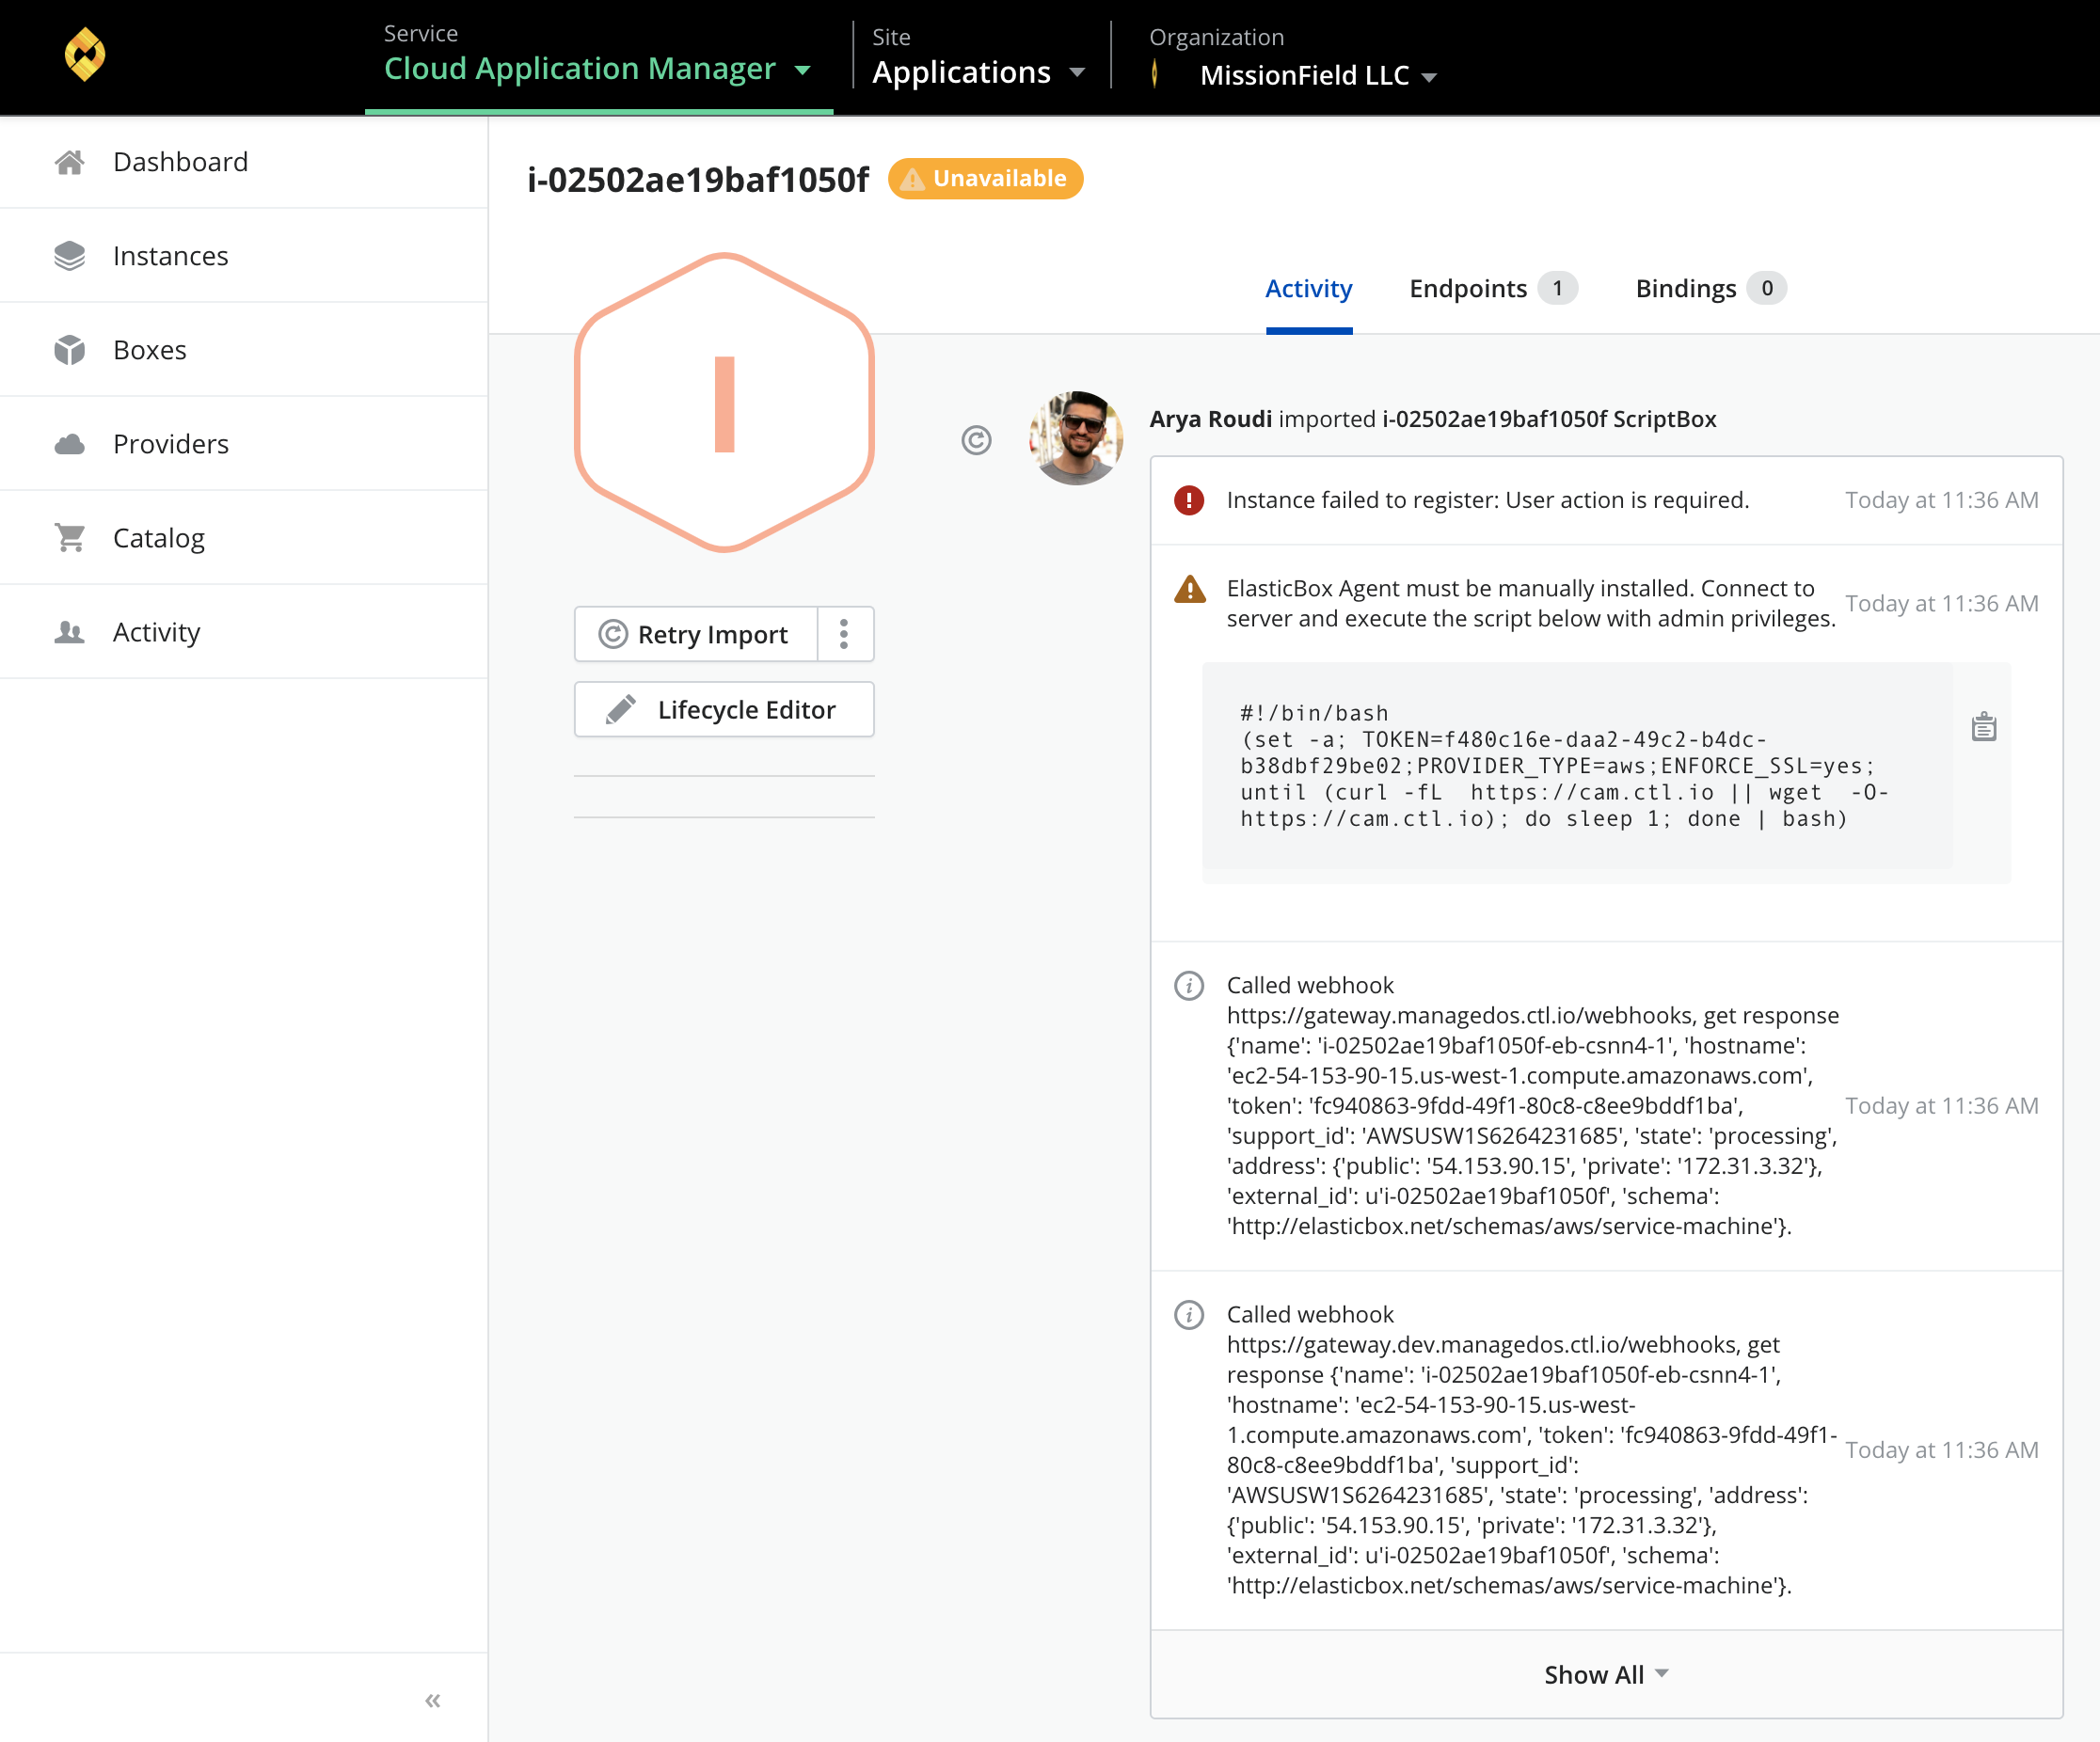
-
Get the endpoint address for ssh connection:
-
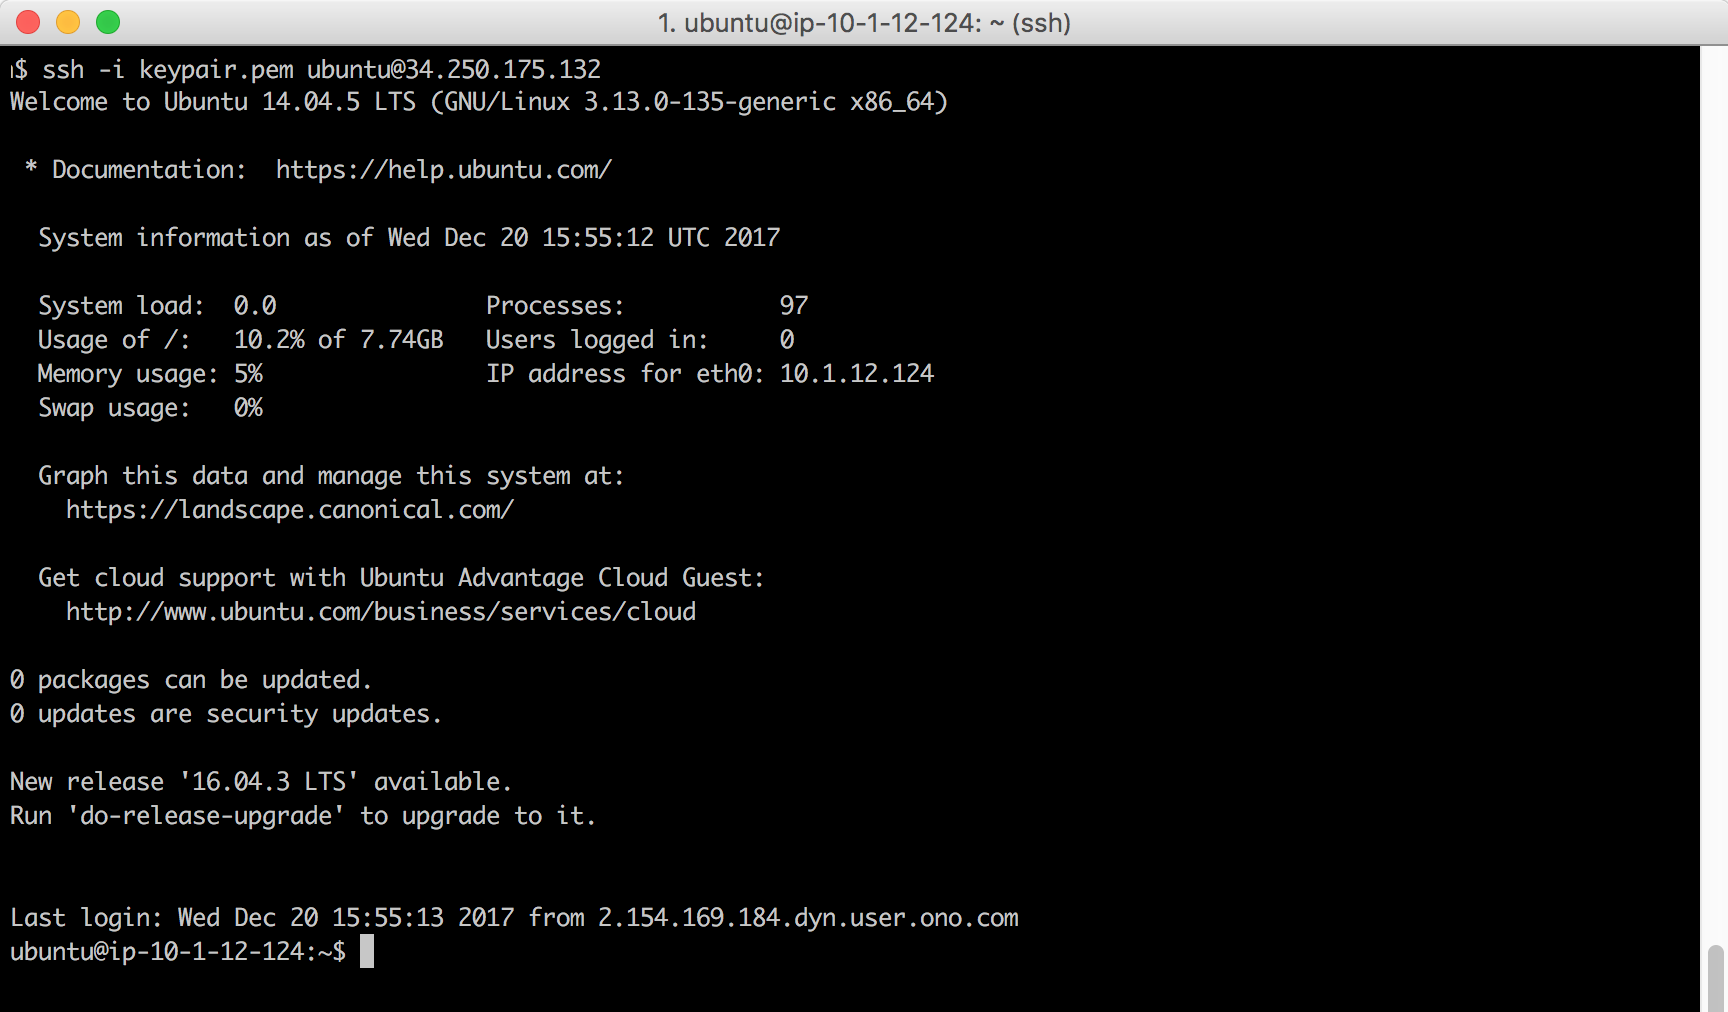
Use your token key-pair and connect to the instance:
-
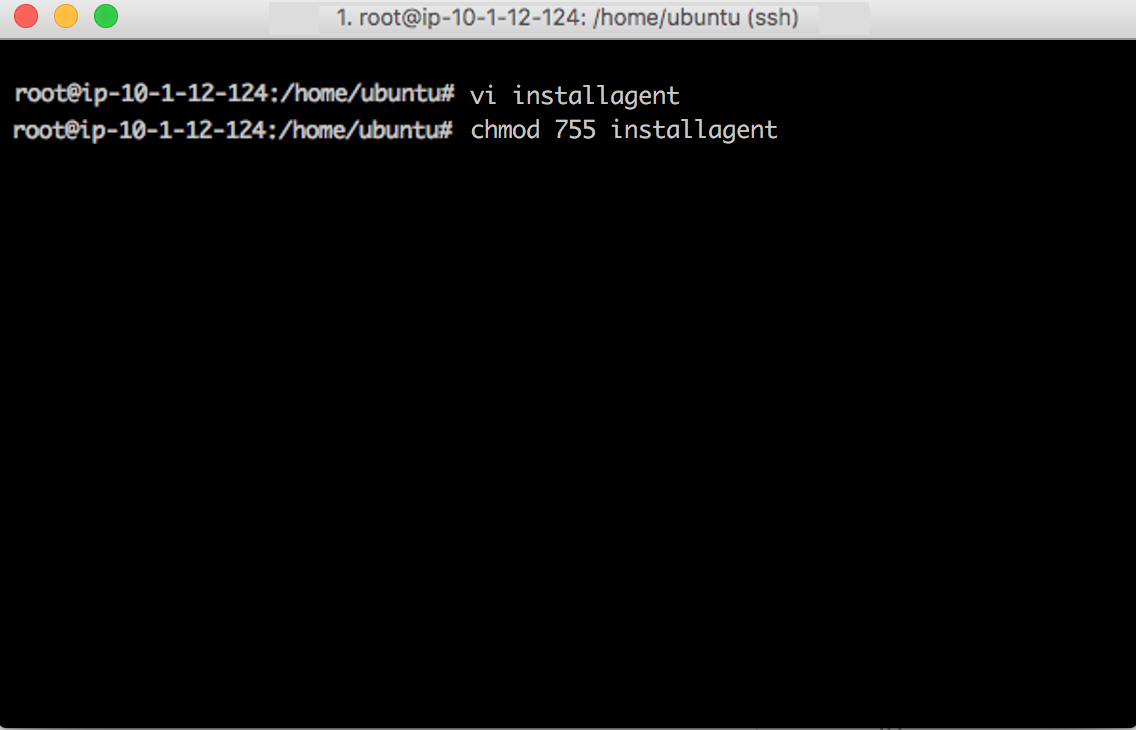
Copy the snippet for manual creation of the agent script:

-
Use your favorite editor to create the shell script by pasting the copied snippet and change execution permission:
-
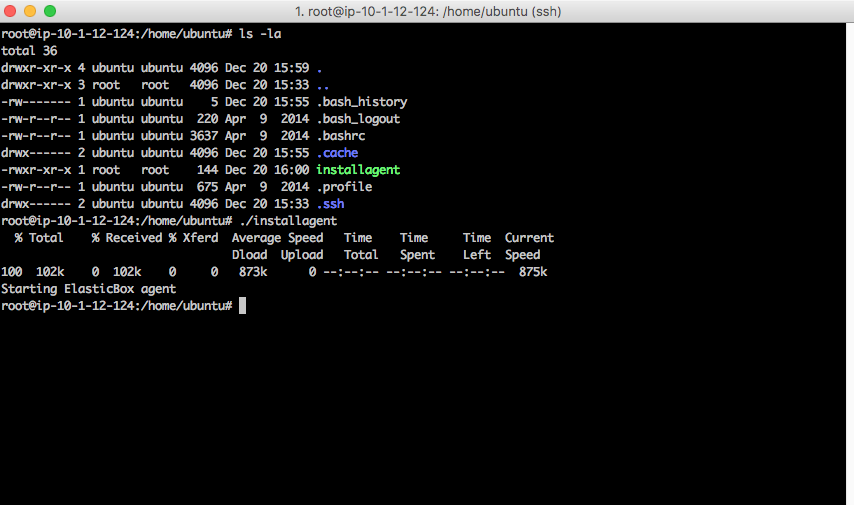
Start agent:
-
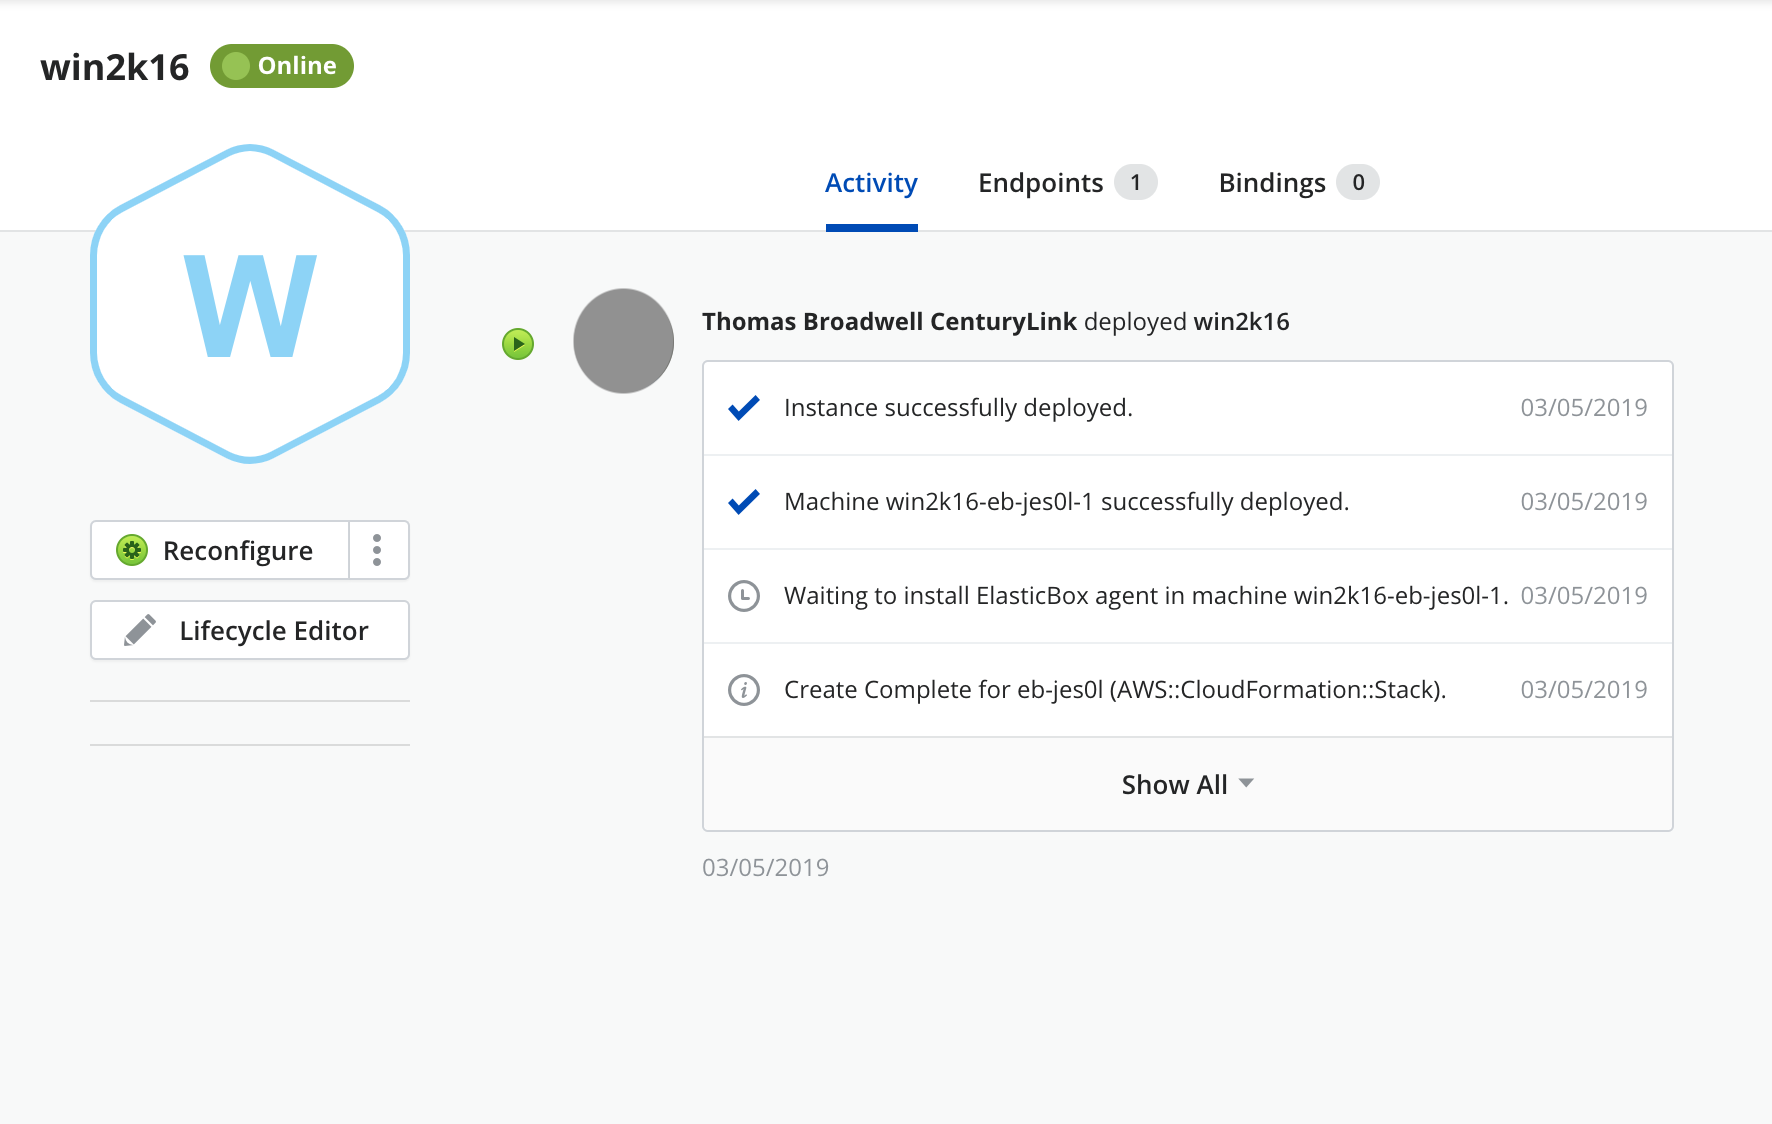
The instance is now successfully registered:
The previous process was done using a Lumen Cloud provider but, depending on the provider or the used OS it may be necessary to perform additional steps after or before the ones stated above.
Please, visit these links for further information:
- Auto-discover AWS EC2 instances
- Register an Existing AWS Linux instance
- Register an Existing AWS Windows instance
- Register an Existing GCP Windows instance
Contacting Cloud Application Manager Support
We’re sorry you’re having an issue in Cloud Application Manager. Please review the troubleshooting tips, or contact Cloud Application Manager support with details and screenshots where possible.
For issues related to API calls, send the request body along with details related to the issue.
In the case of a box error, share the box in the workspace that your organization and Cloud Application Manager can access and attach the logs.
- Linux: SSH and locate the log at /var/log/elasticbox/elasticbox-agent.log
- Windows: RDP into the instance to locate the log at ProgramDataElasticBoxLogselasticbox-agent.log